I have to tell you that today’s recipe goes against everything I believe in and that is using boxed cake mixes in baking. I have used them maybe twice in my life and it was only because my kids begged me to. Does that make me a cake snob I wonder…
Even though they have a nice light and moist texture and they keep for such a long time unlike most home baked cakes, I find them to be very artificial. If I do come across a recipe, and one of the ingredients says “one boxed yellow cake mix”, I run as fast as I can.
So when my friend Mary offered me some of her home made biscotti with my tea, my eyes lit up until she said those dreaded words!!
“It was such an easy recipe Georgina! It calls for one boxed cake mix…….” and everything started fading after that. My ears shut out the rest of the recipe, and my nose wrinkled and I just nodded and smiled as though everything was ok in the world.
Original Recipe
But I felt I owed it to Mary to try them out because she did make them especially for me…and was prepared to politely say something like…
“Mmm, nice Mary”…
…but instead found myself actually saying…
“OMG…these biscotti remind me of the Ottijiet we used to have in Malta growing up…please please share the recipe”
So now I am a snob no more and you will find at least three boxed cake mixes at any given time in my kitchen.
Today was a rather cool day and I really felt the need for something sweet with my nice cuppa tea. Something to dunk…whatever it was, it had to be strong enough to withstand a three second dunk in my hot beverage and not fall apart before it makes its way to my mouth.
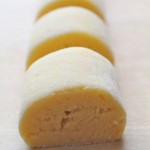
Ottijiet, which translated means the figure eights are perfect for such a deed. They are hard and crunchy Maltese type cookies and can be dunked with success every time. I used to make these Ottijiet using the Figolli dough but have since converted to using this recipe. The original recipe is used to make biscotti but I’ve adapted the recipe to make these lovely dunkers.
Ottijiet
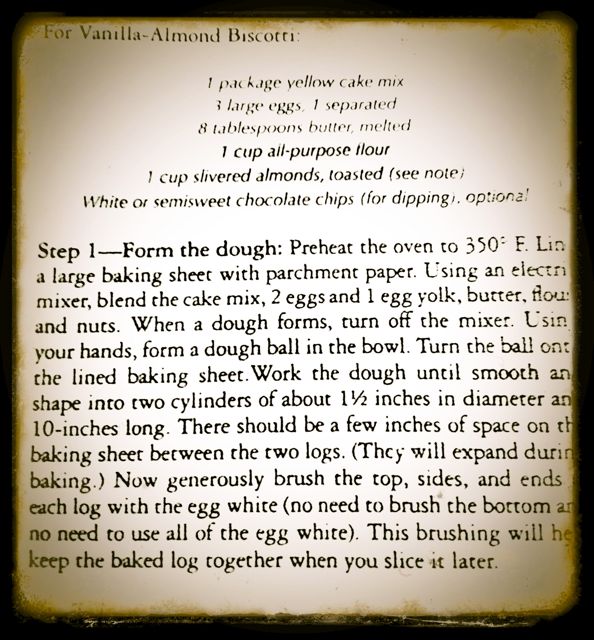
1 package yellow cake mix 2 large eggs
1 egg yolk
8 tbsp cooled melted butter
1 cup all purpose flour
zest of half a lemon
sesame seeds optional
Two Ropes
Cut Into Two Inch Sections
12″ Rope
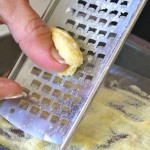
Roll Over Sesame Seeds
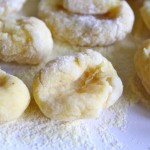
With Sesame Seeds
Without Sesame Seeds
Preheat oven to 350 degrees
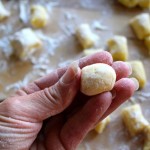
Form the dough by putting all the ingredients together and forming into a ball.
Let rest for half an hour.
Cut the dough in half.
Form into 2 equal rolls.
Cut into two inch sections.
Form each section into a foot long thin rope.
If using sesame seeds, sprinkle some on the cutting board and roll the dough over them so they will stick and not fall off.
Form into the figure 8
Bake for about 18 minutes until golden in colour
Makes 2 dozen 8’s
After ten years of moving from one rental house to another, we finally stopped kidding ourselves that we would ever go back to live in Europe…not to England…not to Malta…or to the South of France which is still one of Kevin’s many dreams! We were only supposed to come to the States on a working visa for one year…and every year after that, every June to be exact, Kevin and I would sit down and go through the pros and cons of staying in the US or going back “home” wherever that was.
Our Friends Knew Best
So in June of 2004, the week before we were set to leave the US, our dear friends Jane and Richard, and Gina and Tom, threw us a Bon Voyage Party. We had already packed everything and told our landlord we were leaving. Kevin had handed in his resignation, and both kids’ schools were notified. But best of all, we had four one way tickets to England.
As we’re sadly saying goodbye to all our friends at our Bon Voyage Party, one friend walked over to Kevin and me and whispered a few magical words in our ears that I will never forget…
“You know you can still get a refund on your tickets right?”…
Kevin and I just looked at each other and without even uttering another word, knew that that was exactly what we had to do! I still don’t know, even to this day, if Michelle has any idea how her words changed the course of our lives. Could’ve been the beer, could’ve been the wine…but the clouds lifted as did our hearts. At that point, we realised that we only had a week in our lease left and had to find a new house to live…and the big question was…do we rent yet again, or do we buy? Luckily we already had everything packed so all we had to do was find a house.
By now I was done with rentals and wanted to feel like we belonged and maybe some space to plant a rose bush or two. And that is when Kevin promised me a Rose Garden which he delivered most graciously.
Black Magic
Black Magic
Black Magic
Intrigue
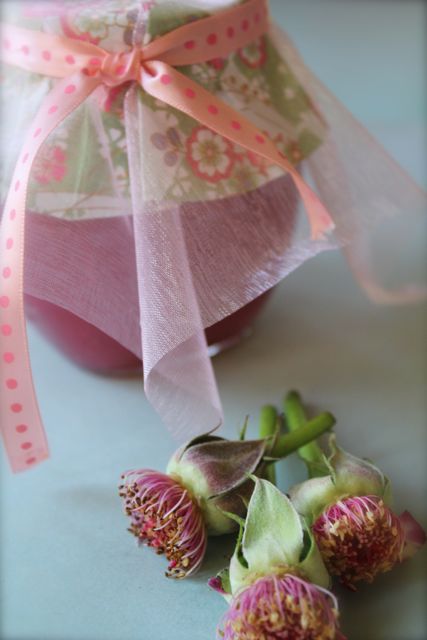
And this recipe was born! I’ve been making it since we moved to this house and every year right about now, when we get our first burst of roses, I go and pick the freshest and most beautiful blooms on the bush.
Before you start, make sure you have all the ingredients ready to use. Clean and sterilize your jars and have them ready close by. Choose your most fragrant and vibrant rose petals you can find in your garden, this way you’ll end up with the tastiest and most gorgeous coloured jam.
This jam will yield about 3 small jars
Rose Petal Jam
Intrigue and Sweet Surrender
1 cup fresh rose petals (must not have been sprayed with any chemicals)
3/4 cup water
juice of one lemon
2 1/2 cups sugar
1 package powder pectin
3/4 cups water
Puree rose petals, 3/4 cup water and lemon juice in a blender until smooth.
Slowly add sugar.
Blend until all sugar has dissolved.
Leave in Blender.
Stir one package pectin into 3/4 cup water.
Bring to a boil and boil hard for one minute.
Pour mixture into the blender that contains the rose petal mixture until well blended.
Do this very quickly as it sets up really fast.
Pour into prepared jars. Let set six hours until firm.
Will keep one month in the refrigerator, but I’ve kept mine much longer with no problems.
Rose Petal Jam
This jam with scones and some clotted cream is a match made in heaven and guaranteed to make any mother happy on Mother’s Day!
I woke up feeling very generous today…and am going to share with you two frozen desserts that are as good as they get!
Of course, I have to share a little story before I get down to the recipes…
I don’t like change. If I can have my wish and eat it too, then I’d like to wish for no change in my life. Sounds boring I know…but I like everything about my life…I like the way it’s going and if it continues going this way, then I’ll be the happiest person on earth! I have everything I need and could ever hope for…so why would I want this to change?
My Sister and I
The reason for this little bit of insight about myself, is because back in 1981, when my sister Rita got married, I did not speak to her for three months! Well, she didn’t just get married! She also moved hundreds of miles away and her leaving felt like I was losing part of me! Ever since we were little, I was always her little shadow. I looked up to her for everything and if I needed advice on anything…from boyfriends to jobs and pretty much everything else, it was her I would turn to. She totally understood that not speaking to her for so long was coming from love. She knew me inside out…and quirky or not, she loved me back!
Jeff
Fast forward 2011…our friends Jeff and Leanne and their two young beautiful daughters decided to move to England!! Yeah…you know what I’m getting at! I thought I’d grown up and had total control of my emotions but maybe not so much. I must say, I was better this time…but I think I may have shown that I was not very happy with their decision. And I hope, that just like my sister, they know that it was out of love…
Leanne and Eliana
I’d asked Leanne if she had an ice cream maker and without hesitation, she quickly went in her storage cabinet and produced her Cuisinart Ice Cream Machine and told me I could keep it as long as I needed! That same month, they decided to emigrate so I kinda inherited the ice cream maker although I see it more as looking after it until they come back! And I hope it won’t be that far in the future! Thank you Leanne for trusting your ice cream maker in my care! It works brilliantly!!
Jazz and Eliana
Jazz, Eliana and Emelina
Jazz and Emeline
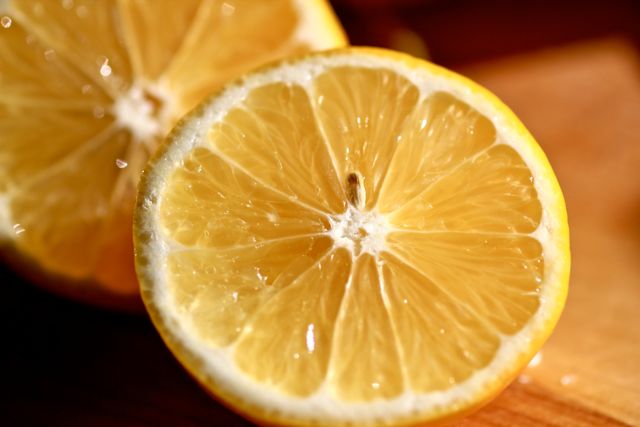
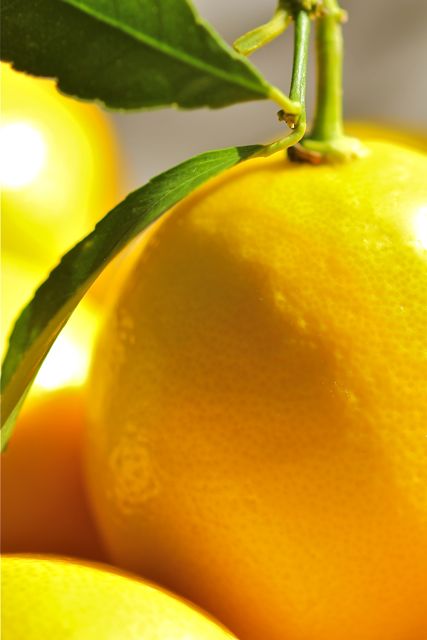
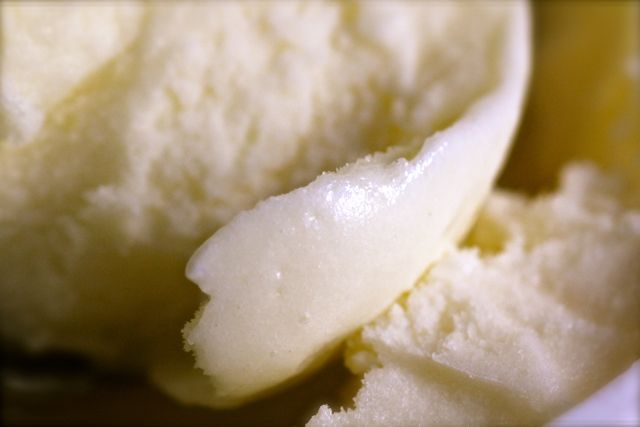
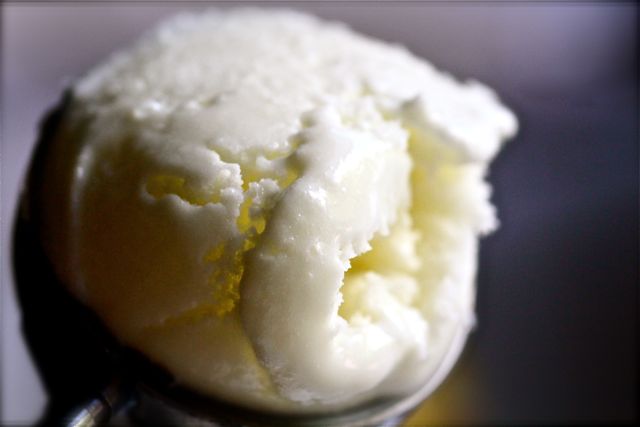
We’ve had a few very hot days recently and I still have quite a few lemons left on my Meyer Lemon Tree so I’ve been looking around for a good recipe for Lemon Ice Cream and one for Lemon Frozen Yoghurt!! Bingo…I found just the two. They are both soo good and refreshing that no tweaking was required. You won’t be disappointed if you make these!
Lemon Yoghurt Ice Cream
Meyer Lemon
Ingredients
1 1/3 cup heavy whipping cream
1 1/3 cup full-fat natural yoghurt
2 medium sized lemons, finely grated zest and juice
1 3/4 cup sugar (check for sweetness)
1 1/3 cup whole milk
Whisk the cream in a bowl until soft peaks form when the whisk is removed. Stir in the yoghurt, lemon zest and juice, sugar and milk. Whisk until well combined. Pour into ice cream maker and follow it’s instructions.
This makes two batches in my machine so if you don’t want to make that much, I’m sure you can half the ingredients.
Lemon Yoghurt Ice Cream
If you don’t have an ice cream maker and still want to try making this recipe, follow these instructions:
Whisk the cream in a bowl until soft peaks form when the whisk is removed. Stir in the yoghurt, lemon zest and juice, sugar and milk. Whisk until well combined. Pour into a shallow plastic container, cover with a lid and freeze for at least six hours, preferably overnight, until firm. Remove the ice cream from the freezer, cut into chunks and blend in a processor until smooth and creamy. Return to the plastic container, cover with the lid and return to the freezer until required.
3 cups strained/Greek-style yogurt (or whole milk yoghurt)
3/4 cup sugar
1 tablespoon lemon juice (or more according to taste. I use juice of half a lemon)
2 tablespoons grated lemon rind
First strain the yoghurt in a cheese cloth lined sieve over a bowl for about two hours.
Mix together the strained yogurt, sugar, lemon juice and lemon rind. Refrigerate for at least one hour. Freeze in an ice cream maker according to the manufacturer’s directions.
Both are very easy recipes. No eggs so no eggy taste…which I really really hate. Just very refreshing. The only thing is that it’s hard to stop at one bowl…so you have been warned!!
In 2008, we had a “For Sale” sign out on our lawn! It was a bad time in Silicon Valley and hi tech companies were closing down regularly and laying off a lot of workers. Unfortunately, the company where Kevin worked also closed down.
Mount St Helens
We were very fortunate that within a few days, Kevin was offered a job with Web MD but the downside to that was that we would have to move to Portland, Oregon. I have nothing against Portland except for the weather and maybe the thought of not having a lemon tree in my back yard.
Kevin did accept the job, but because it was still during the school year, I stayed behind with the kids until school finished and got the house ready to sell.
During that Spring Break, the kids and I went to Portland for a week to get a feel of the place. The day we arrived, it looked like it was the perfect place for us. 80 degree weather…gorgeous market just a few minutes away from where we were staying!! What’s not to like? Until the warm sunny skies turned to rain the very next day. And then to hail on the third day, snow on the fourth, thunderstorm on the fifth, and to wrap things up, we went back to beautiful sunny skies on our last day. We had experienced a whole year of weather in one week!! I guess Portland was showing me what it was all about! Did I say that was in April??
First Beautiful Day at the Market
Ivan the Great
Watching Ivan the Great
Waiting for Realtor
Getting Colder
Keeping Warm at Indoor Pool
Chilly Portland
Sleet in Portland
Snow in Portland
So we said goodbye to Kevin and came back home and we continued our skype relationship for the next few months.
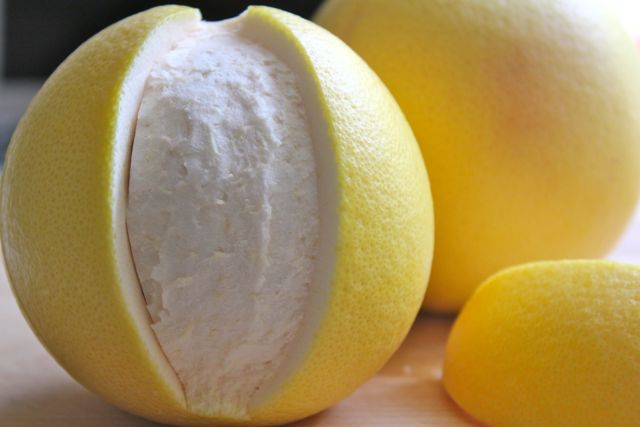
So what does this have to do with a grapefruit tree? Well, I’m coming to that.
For Sale
I was hoping against hope that we would not find a buyer for our house after that whole weather thing. Every time a potential buyer would come to view the house, I would give them the evil eye! And you don’t want to see my evil eye…it’s not pretty at all! But we did get an offer and that was one of the saddest days of my life! When Kevin saw how sad we all were, we came to the agreement that Portland was not to be, and I think that was one of the saddest days of Kevin’s life because he loved and still loves Portland. But always having the family’s best interest at heart, he packed his things and came back home. He did get to keep his job with Web MD and commuted back and forth for the next four years! Kevin, I don’t know how we can ever thank you for this!
And this is where the grapefruit comes in…
Grapefruit Blossom
Kevin loves grapefruit!! So to commemorate the day of his return, a grapefruit tree was planted! It’s been over 5 yrs since that awful sign was on our lawn and this year was the first year that Kevin’s been rewarded with fruit!
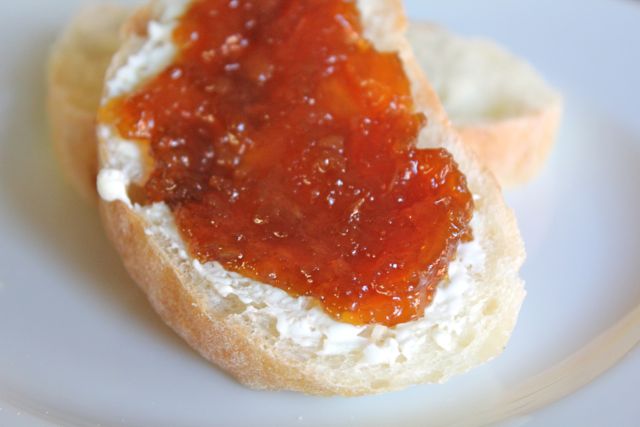
And when you have grapefruit, you make marmalade!
Now I do not recommend this recipe unless you really like grapefruit AND marmalade. It is sweet but also quite bitter. But funny thing about sweet and quite bitter is that once you take a bite, you can’t help but take another bite, and another, and another! Vera true this ta’! I was almost not going to blog this recipe because I don’t like grapefruit OR marmalade, but after tasting it, well….you be the judge!
Recipe Source
I got the recipe from here and tweaked it just a little bit. I used golden brown sugar instead of granulated sugar and I used Curacao instead of Campari because I did not have any Campari. I don’t think it made much difference. I also halved the recipe in case it was a complete flop!
Grapefruit and Curacao Marmalade
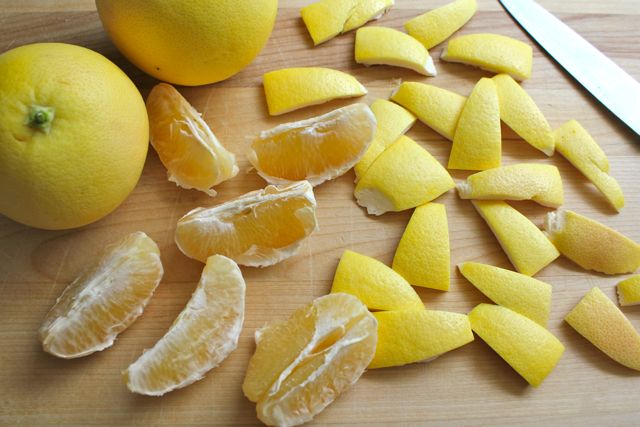
Peeled Grapefruit
3 pink grapefruits
1/3 c. Curacao
Golden Brown Sugar –about 2 1/2 cups depending on the amount of volume of prepared fruit.
Peel the grapefruit and cut the rinds into 2” pieces. Bring a medium sized pot of water to a boil. Drop in the rinds and boil for 1 minute. Drain and discard the water. Repeat two more times using fresh water each time. When done drain the rinds well.
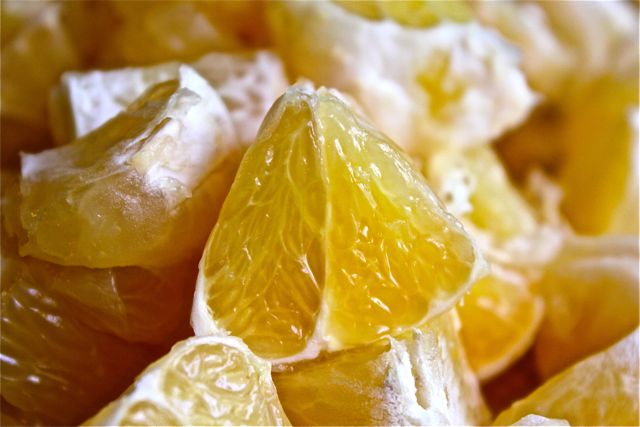
Taking care to catch the juices, cut the peeled grapefruit flesh into 1” slices and pick out the seeds. Discard the seeds.
Blend
Place the chopped fruit and accumulated juices into a food processor fitted with a cutting blade and process for 1 minute, until the mixture is well-chopped and frothy.
Measure the amount of chopped fruit and juices using a large measuring cup. Return 1 cup of the fruit to the food processor. Pour the remainder into a large heavy pot.
Measure out the same amount of sugar as thetotalamount of the fruit and juice mixture. Place the sugar in the pot with the fruit.
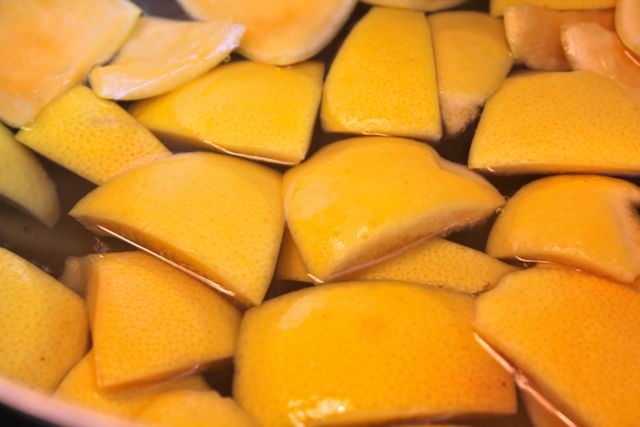
Get rid of as much pith as you can from the drained rinds
Boiled Grapefruit Rinds
Add the boiled, drained rinds into the food processor with the reserved 1 c. of fruit. Pulse for two to three minutes until the rinds are cut into small bits.
Stir the chopped rinds into the fruit and sugar mixture in the large heavy pot. Stir in the Curacao.
Bring to a boil, stirring, and reduce heat to maintain a constant simmer. Cook for 25 minutes, stirring gently to prevent scorching and boil-overs. The color will darken as the marmalade thickens.
If you have any doubts you can test the marmalade: put 1 T. on a small plate, put the plate in the freezer for three minutes. The marmalade is ready if it no longer is runny.
Pour into sterilized jars, seal and process in a boiling water bath for 10 minutes.
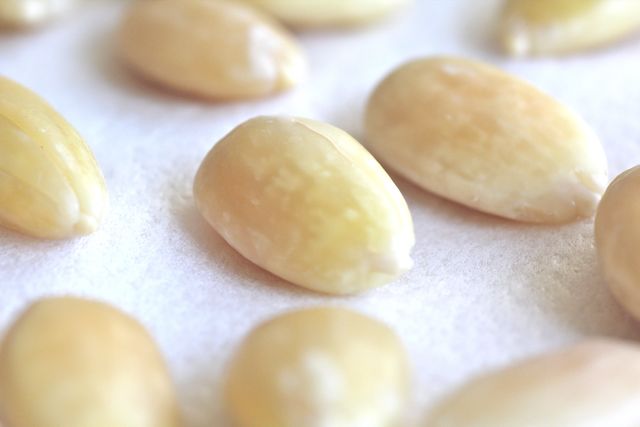
Aaron once asked me if almonds were a national source of income in Malta. I wondered how he’d come to that conclusion until he pointed out that the desserts I tend to make always have some kind of almonds or marzipan in them. It is quite true that I do do that, but I think the reason why I love working with almonds so much is because they are so darn good.
Blanched Almonds
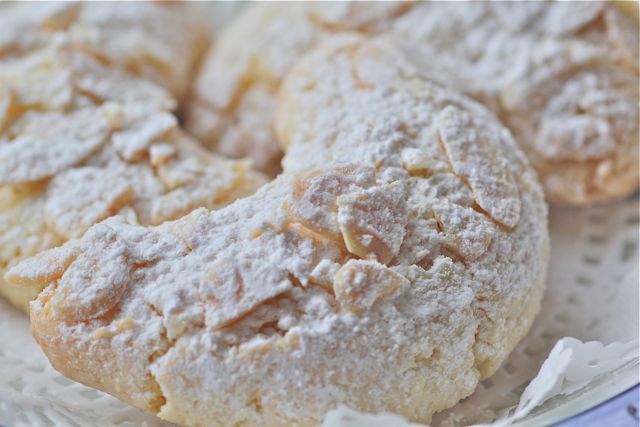
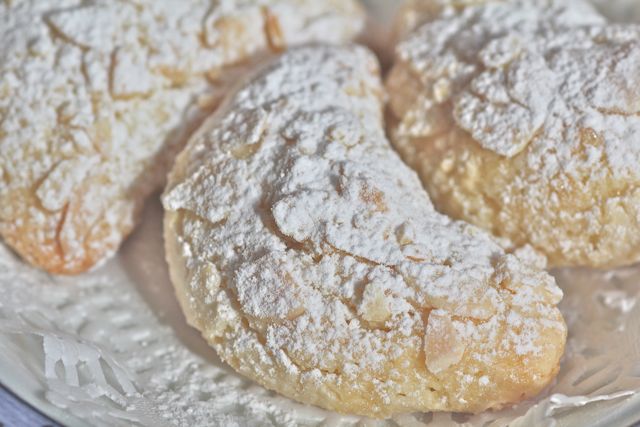
Pastini Di Mandorla means Almond Cookie and it is another recipe I love to make from the book by Edward Calleja Success Bil-Helu 2, the other one being Pastini Bic-Cirasa…not only because they are super delicious, but also because they are a cinch to make.
They require only one egg white, which means, you’re not left wondering what to do with so many left over egg yolks. Even better, if you use liquid egg whites, then you’re left with no egg yolks at all!!
Also, as opposed to other almond cookies, these require no drying time at all…so if you fancy these cookies at 2pm, you can be happily eating them by 3pm.
Ingredients
Pastini Di Mandorla
200g pure ground almond 200g powdered sugar zest of a lemon one egg one tsp almond essence one egg white beaten for dipping about 3/4 slivered almonds to use as topping rice paper (optional if you use a silpat)
Method
Preheat the oven to 350 degrees
Place the rice paper if using, on the baking dish.
Mix all the ingredients except for the slivered almonds together in a bowl to form a ball. Do not be tempted to add more liquid as this is supposed to be on a dry side. If you add more liquid, the cookies will flatten and you don’t want that. If you see that the result is too sticky, add more ground almonds.
Cut the mixture into four equal pieces. Roll into four long ropes. Cut into two inch pieces.
Form into crescents.
Beat the egg white in a small bowl. Place the slivered almonds in a flat plate.
Dip the crescents in the egg white, then again in the slivered almonds and then place on the prepared baking dish.
Bake for 15 mins until just golden.
Cool on wire tray and sprinkle some powdered sugar for presentation.
Next time I see Aaron, I’ll be making these for him!
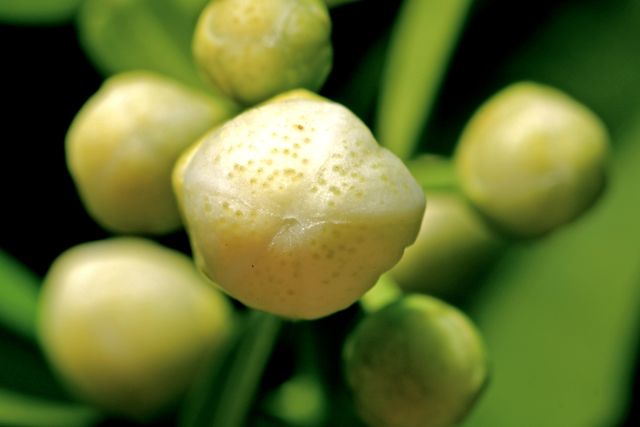
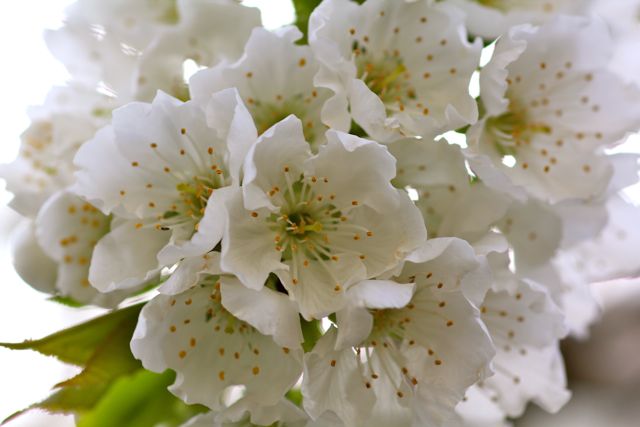
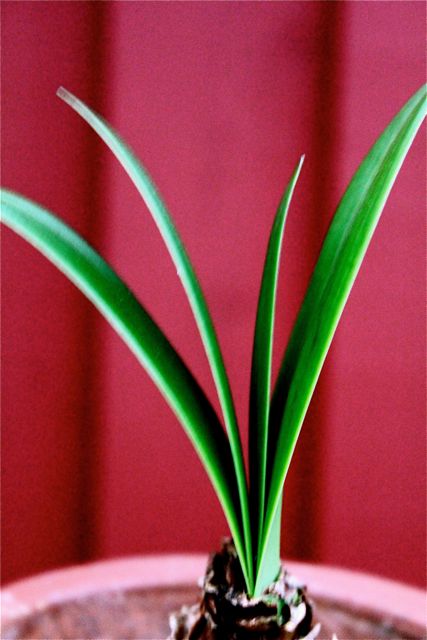
It’s been a long time since I’ve seen this much blossom in my garden. When we first moved into this house, I knew close to nothing about gardening and I hope that now, eight years later, I’ve learned to at least recognise weed from plants. After living in apartments and town homes for such a long time, I was so excited to have my own garden, that I could not wait to dig in and dig out what I did not like.
Surviving Amaryllis
No I did not listen to Kevin when he urged me not to touch anything for a whole year and to just to see what the garden had to offer. Instead, I got my nice shiny new shovel and started digging out multiple agapanthus plants which I really disliked and threw them out!
Lucky for me, that day my friend Kalpana came by to visit and saw my huge clump of green waste ready for Friday’s Pick Up and asked me why I was getting rid of so many Amaryllis!! Aaaagh…what…amaryllis?? What had I done? I LOVE AMARYLLIS!! So I frantically went head first in the garden bin and picked up and replanted each and every one like the garden fool that I was. That was my first lesson in gardening. Listen to Kevin!
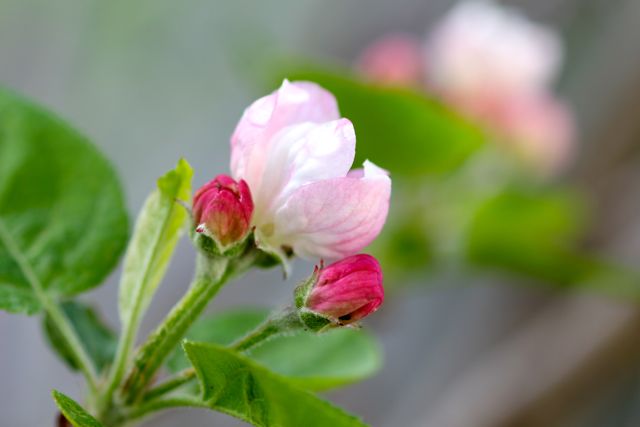
Apple Blossom
Oh apple tree!! The first year you gave us an abundance of the most delicious apples I’d ever tasted. I had no idea how to take care of you though. In my eyes, it looked like you needed a good prune so I grabbed my clippers and prune I did!! I pruned you so hard that you didn’t give us any apples for the next FOUR years!!
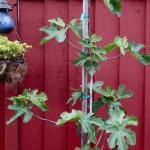
Fig Leaf
Oh baby fig tree…I wanted to espalier you like I see at the garden centres. How hard could that be? My lovely husband even built me a sturdy frame to train you against the fence but I pulled so hard at those delicate limbs of yours that they snapped right into my hands. So now you have been retrained into a standard tree and I must say you look very straight and proud, no thanks to me. I’m still waiting for that first fig though but I think you might be punishing me for being so mean to you.
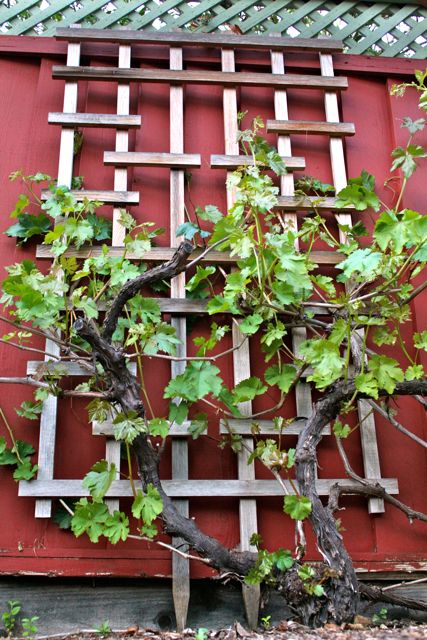
Grape Vine
Oh grapevine! How many times did I threaten to dig you up because of the way you tend to vine and cling to everything that comes your way like something out of a horror movie. You have Kevin to thank for that you know and I have to say he was right not to give in to me because you give out the most delicious grapes ever. Even the birds think so.
So when I came out to the garden this morning, I was totally overjoyed to see so many blossoms. It feels like my garden has finally forgiven me!
Cherry Tree
Fig Tree
Plum Tree
Yes I made plenty of mistakes in my garden…and I still do occasionally but hopefully not as drastic. Luckily, trees are very hardy and laugh at people like me. They seem to have an endless supply of leaves and fruit…how awesome nature is!
Last weekend we went to Petaluma. We’d only been talking about going for about four years! But now that the kids are older and can be trusted not to burn the house down, well, we thought an overnight stay, just the two of us, would be a good thing.
Lagunitas Sampler
What made the occasion a must this time round, was that it was Kevin’s b’day. His wish was to go to his favourite brewery in the whole wide world and as luck would have it, it’s only a couple of hours away. So, just like I celebrated my b’day with my favourite goats, it was only fair that he should celebrate it with his favourite beer!
Having lived here for so long, I’m still surprised at how much there is still left to see and experience! I was totally delighted by what Petaluma had to offer. Nobody has ever said that this place is a must see, so my expectancies were kinda low. Besides, I honestly thought that the whole weekend was only going to about beer and more beer. But when we started walking around town and saw the cute little antique shops and people just lapping up the sun outside the charming Bistros, I wanted to stop and savour every minute. We couldn’t have asked for a more beautiful day either. The sky was blue and the air was warm…and what was that???? Is that French I hear??
Bistro
French Icons
French Icons
French Folks
Faux French
Faux French
Cherry Blossom By Mill
Boats
Little Square near Town Centre
Sacre Bleu!! It was!! It seemed to me that for the most part, the locals were actually french! I could catch snippets of french conversations going on at every corner and bar! And with French music playing in the air and french decor in every restaurant, I felt like I had just stepped into Woody Allen’s Midnight In Paris! And I fell in love!!
I had almost booked us a room at a Days Inn or Best Western, as Kevin’s only priority was that we were close enough to Lagunitas Brewery so he could have his pint and drink it…literally…and not worry about the driving part. So I almost did not see this quaint little Metro Hotel just down the road from Petaluma’s Town Center. It was perfect!! The french decor just added to our french experience and next time we go…and I’m pretty sure there will be a next time…we will definitely stay there again.
Metro Front
Up Spiral
Mes Amis Room
Down Spiral
Late Night Cafe
Snow White and 7 Dwarves
Go Kart
Blue White and Red
Poster of Paris Bar
Trash Can
Morning Charge
Side by Side
The Lagunitas Tour was also very entertaining. We could hear the boisterous laughter from the parking lot which became louder and louder and more enticing as we neared the entrance of the bar! It was full…the inside bar, the outside beer garden…pretty much every space was taken…but for a tiny corner at the end of the room. We sampled some beer while we waited for our tour…well one of us did…and then were led to where the magic happens.
What’s On
Pils Pale Ipa
Bar Food
Bar People
Hops
Beer Storage
Lagunitas Types
Lagunitas Types
Lagunitas Types
Little Bit Country
Cheerio
Lagunitas IPA
Before we left, we paid a visit to Sonoma which is another very interesting and charming town. You find anything from Cheese Shops to Hat Shops, and Pottery Shops to Restaurants.
Got Cheese?
Alley Way
Best Pottery Shop
Maybe it was because it was our first get away together with no kids in like ever…but what a marvelous weekend that was…and we both hope to return very very soon!
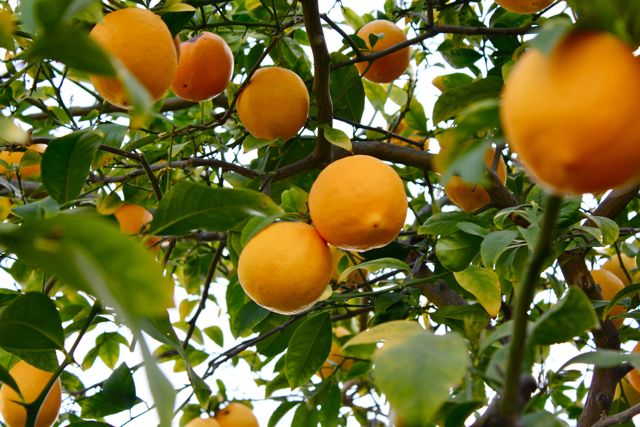
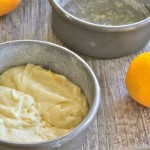
Now that my baby hummingbirds are no more and I don’t have to tip toe around my lemon tree anymore, I have been thinking of ways that I can use up the numerous lemons it still has left on it.
Meyer Lemons
Lemon marmalade~Check
Lemon Marmalade Truffles~Check
Lemon Salt~Check
Lemon Olive Oil~Check
Endless Amounts of Lemonade~Check
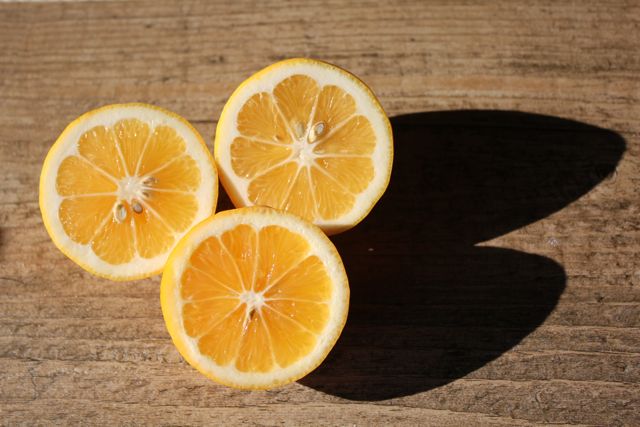
I have a few lemon cake recipes that are a staple in my collection but I’m always on the look out for new ones that may come my way. So when my friend Karen graciously shared some of her lemon cake with me last week, my eyes lit up. And when she shared her recipe…well!! I then quickly picked some lemons and got started.
I was blown away with the tanginess and moistness of this cake. I tweaked the recipe just a tiny bit…and I think if you like a strong lemon taste in cakes and baked goods, then you can’t go wrong with this one!
Meyer Lemon Cakes
Ingredients
4oz butter
2oz sour cream
3 eggs
8oz sugar
8oz self raising flour
1tsp baking powder
about half a cup of lemon juice (according to taste)
zest of one lemon
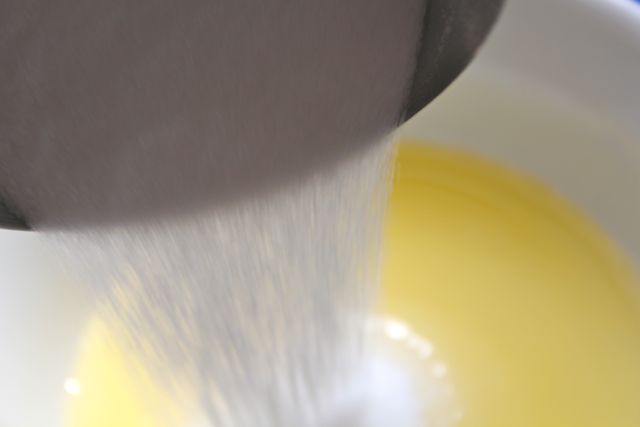
Cream butter, sour cream and sugar together until light and fluffy.
Add eggs, one at a time.
Slowly add in flour, baking powder and salt. Then add lemon juice and zest of one lemon.
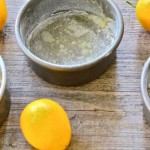
Butter and flour a pan of your choice and pour the batter in the pan. You can make into cupcakes or use a Bundt pan. I divided my batter into three five inch cake pans.
Buttered and Floured Pans
Pour Batter in Pan
Lemon Cake Batter
Place in a cold oven. Set the oven to 350 degrees and bake for one hour if putting in a Bundt pan. Check after 45 mins. Allow to cool for 10 minutes and turn out onto a cake platter.
Prepare Lemon Glaze
Glaze
juice of a lemon
4oz sugar
In a small bowl, combine the juice of one lemon and ½ cup sugar.
While still warm, drizzle the cake with the lemon glaze and let cool.
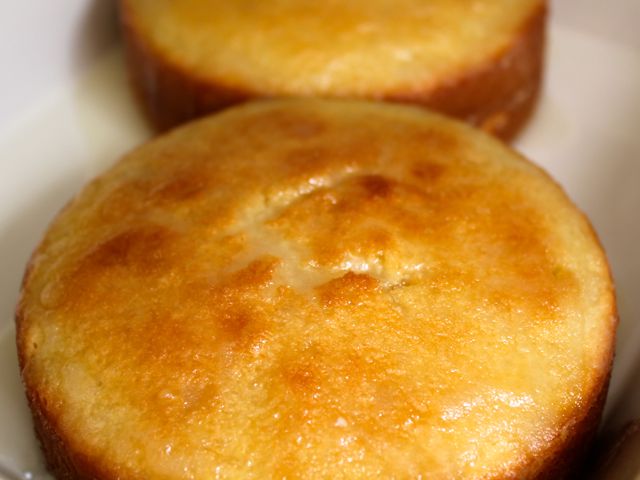
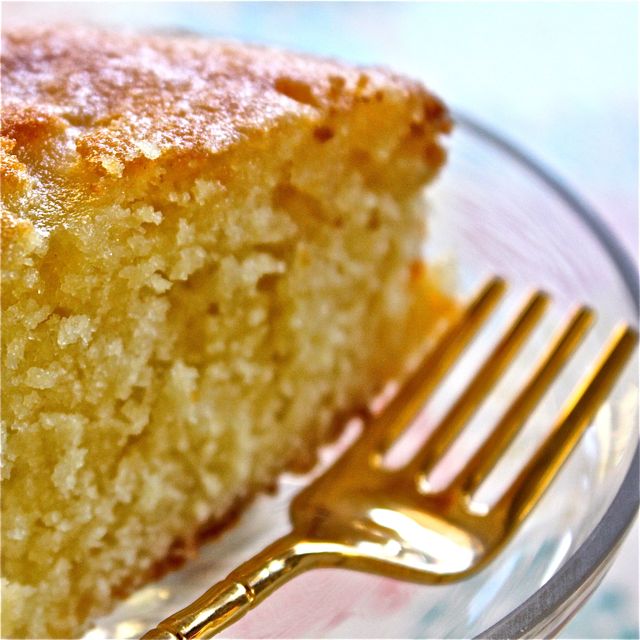
Meyer Lemon Cake
Kevin just reminded me that the best way to use meyer lemons is squeezed into a glass of gin…Cin Cin Kevin!!
And since we’re on the subject of Anniversaries and Weddings and all that mushy stuff, I thought I’d share with you our Wedding Song. Never fails to bring tears to my eyes. Very Special Time and Very Special Memories! To 20 Wonderful Years!
Oh potato gnocchi!! You don’t bring me the good memory that you should…but it is a memory…and kind of funny too although it didn’t seem to be at the time!
Kevin and I had just gotten married and moved in Mr Daniel’s flat where we just had the essentials…couple of pots and pans, a kettle, two plates and two mugs! It was all we needed. We ate out the first few nights…but then I wanted to show my new husband what I could do.
Fresh Gnocchi
I remembered an Italian friend had made these delicious gnocchi for a group of us once. He was like the maestro on one side ofthe table, with a bunch of girls surrounding him, watching him orchestrate this magnificent dish. It looked so easy…but then so does gymnastics and ice skating.
So that was it…that’s what I’d make for our first dinner I thought, as I set about this joyful task! I worked and slaved all day long in the kitchen while my new husband was slaving away at his job. And then the moment of truth! I boiled the gnocchi I’d made, but no amount of sauce could hide the mess underneath! I was in tears!
Kevin
My lovely husband sat down and got ready for his meal and just like the trooper he’s always been and still is, he put that first bite in his mouth and with a smile told me how good it was!! He never did make it to the second bite though because I snatched it from his hand, and took the plate from the table and with a whoosh, and a few sobs, they ended down the toilet! He still does not know what he had said to get that reaction from me and still insists to this day, that they were jolly good gnocchi…but wouldn’t you say that to your new wife?
So it’s been 20 yrs since that fateful day!! I never made them again and still get the shivers when I hear the word GNOCCHI!! But since I have a blog, and since it’s our 20th Wedding Anniversary today, I think it’s about time I gave it another go, this time with the help of foodnetwork.
Ingredients
Kosher salt
1 pound russet potatoes (two medium sized potatoes)
3 to 4 large egg yolks
1/2 cup freshly grated Parmesan
1/4 teaspoon freshly grated nutmeg
1/2 teaspoon gray salt
1/4 teaspoon freshly ground black pepper
1 cup all purpose flour
Flour and Nutmeg
Grated Potatoes
With the Help of Lambic
Directions
Preheat oven 425 degrees. Bake the potatoes for about 45 mins.
When cool enough to handle, take off the skins and grate the potatoes in a bowl. You should have about two cups.
Add the rest of the ingredients and form into a ball. Let rest for half an hour.
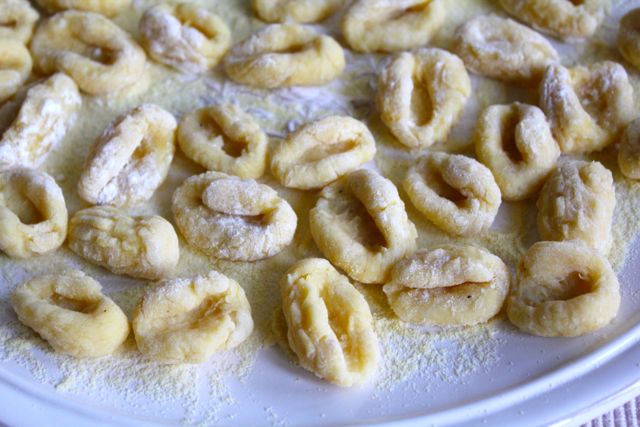
Keeping your work surface and the dough lightly floured, cut the dough into 4 pieces. Roll each piece into a rope about 1/2-inch in diameter. Cut into 1/2-inch-long pieces. Lightly flour the gnocchi as you cut them. Roll each piece into a ball.
Using the back of a grater, roll each piece down the back. This creates a rough surface for the sauce to cling to. Do this with each piece. Place on a well floured (or well sprinkled with semolina).
Two Rolls
Four Rolls
Cut Into Nuggets
Nuggets
Keep Floured
Rolled Balls
Forming Gnocchi
Upclose
All Done
At this point you can freeze them.
Or if you want to cook on the same day, you need to let dry for about half an hour under a fan. Turn each one and let dry for another half an hour.
When ready to cook, bring a large pot of water to a boil and add salt. Drop in the gnocchi and cook for about 90 seconds from the time they rise to the surface. Remove the cooked gnocchi with a skimmer, shake off the excess water, and serve as desired.
Boiling Gnocci
Done
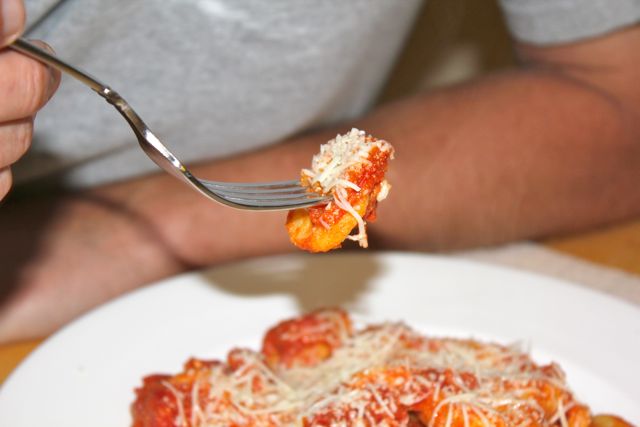
Serve With Fav Sauce
Delicious with tomato sauce and I’m sure it’s just as nice with just butter and cheese and some herbs of your liking.
Moment of Truth
This time, I must say, the gnocchi got two thumbs up. Not just from Kevin…but also from me:) I wish I hadn’t waited 20 years to try these again. I will sure not wait another 20!! Happy Anniversary my qalbi…here’s to many many more!! Love you with all my heart!