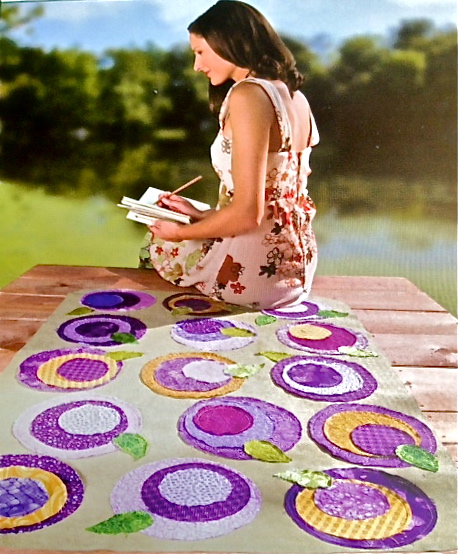
Here’s a calorie free project for you to try. It is simple and cute and it is also a no sew project…now we’re talking!!
The hardest part for me was choosing the fabric and it took me three visits to Jo-Ann Fabric store. Each time I would load up the cart with numerous different rolls of fabric…walk around for about three hours
until I felt nauseous and then when I couldn’t take it anymore, I would walk out with nothing. I thought for sure I was going to have my picture on the “Unwelcome Customers Wall” by the end of it.
But then my friend Rose came to the rescue and between the two of us, we ended up choosing this combo. These, plus a few more scraps I had at home, ended up being more than enough.
Here’s the recipe
1 yard Crypton home decor fabric
Calico Fat Quarters 8-12 purple, 3 gold, 3 green
1 pkg HeatnBond Lite
Poster Board Circle Templates 8″, 7 1/4″, 6″, 5 1/4″, 4″, 3 1/4″
Pressing cloth
Scrap of poster board for leaf pattern
Directions
From Crypton Fabric, cut 30″ x 42″ rectangle. Round the corners by tracing around with small plate. Cut off square corners. St Fabric aside.
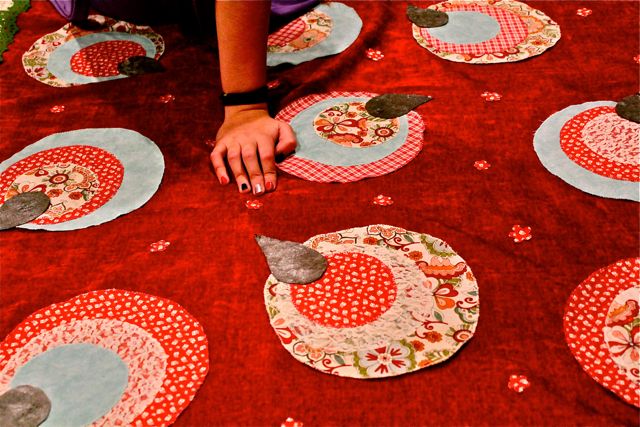
Flower consists of 3 calico fabric circles, 8″, 6″ and 4″. Cut 15 circles of each size from purple and gold fat quarters.
From HeatnBond, cut 15 circles of each size, 7 1/4″, 5 1/4″ & 3 1/4 ”
Follow manufacturer’s insturctions to fuse HeatnBond circles to back of calico circles; leave 1/4″ raw edge around. Peel off paper backing; arrange circles on RS fabric rectangle. Using press cloth, fuse circles in place.
Make two leaf patterns on poster board scrap. Cut one pattern 1/4″ smaller all around. Cut 17-20 HeatnBond leaves from smaller pattern and cut the same number of green fabric leaves from the larger pattern. Fuse the HeatnBond leaves to the back of the leaf fabric, leaving 1/4″ raw edge all around. Peel off paper backing; position into place; fuse in place.
Stitch around each fused leaf and flower circle 1/4″ fro raw edge.
Rub edges of flowers and leaves with toothbrush for a soft, raveled look.
It took me about four days to make from start to finish. Now I want to go on a picnic…
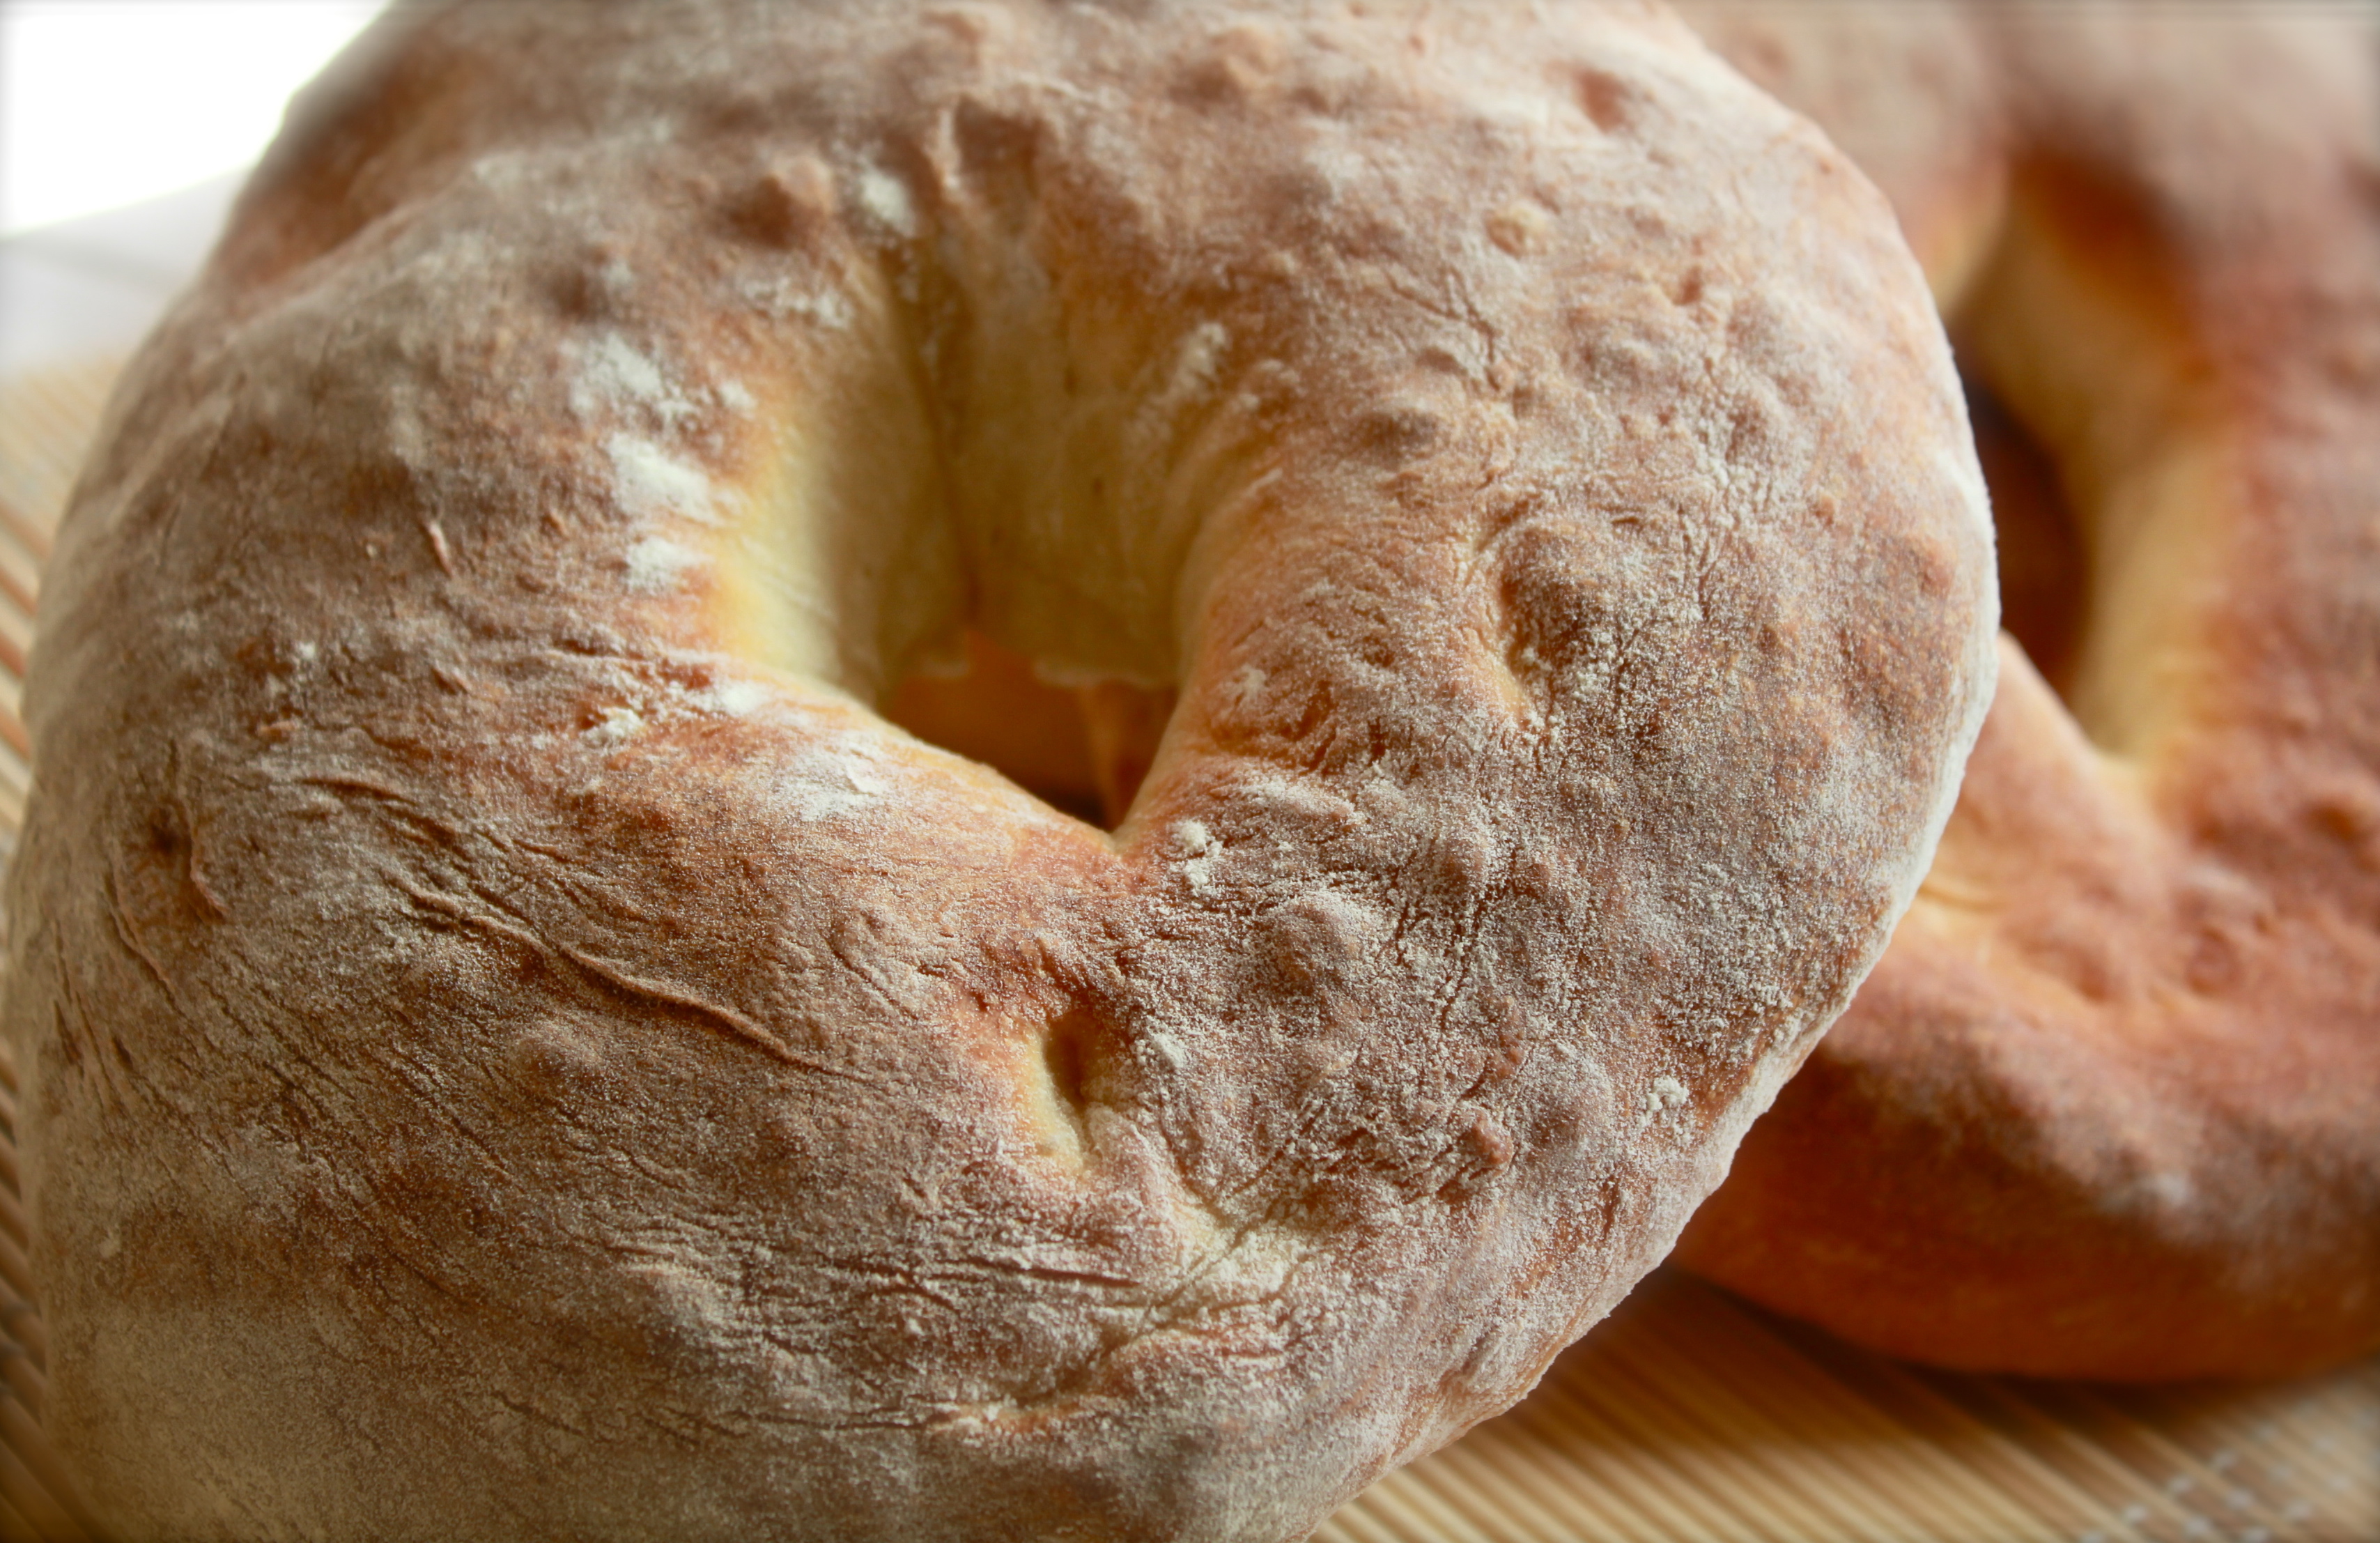
Now that we’ve mastered the Maltese Bread and Ftira, we can work on the filling!! In Malta, our most favourite way to have the bread is with kunserva. Hobz biz zejt u l-kunserva…nothing like it. So that’s bread with tomato paste and olive oil.
Of course you can also go all gourmet and add anything that you like…maltese sausage, gbejniet, which is a type of maltese cheese, canned tuna fish, chopped up onion, cannelini beans, pickled veggies, capers, olives…the list is endless…make up your own combination of your favourite things. Parsley or Basil, some olive oil, salt and pepper and oh it’s just heaven on earth!
On certain days I feel more homesick than others. Even though I’ve been living away from Malta for twenty years, I still feel that twinge of sadness when I see photos of Malta or read what’s going on on my little Island. One thing that helps on days like these, is baking Maltese goods…but yesterday I found another way to feel the closeness and get that good old fuzzy home feeling.
My friend Karl sent me a link to a show on HGTV called House Hunters where they feature couples and people from all over the world, looking for real estate in Malta. I tell you…it’s just what the doctor’s ordered!!
I’m afraid this link can only be accessed by residents in the US.
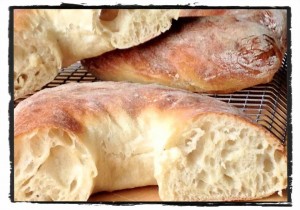
I don’t think it would be appropriate to have a blog called Tal-Forn and not include the best bread recipe ever! Anyone who has ever tried it has given it 5 stars and I guarantee that if you try this, you won’t be disappointed and we’ll be bread friends for life!
In fact, this recipe has made me quite a few friends, from around the world. But first let me tell you a little bit about how it came to be.
When we came to live in the United States, back in 1994, there were quite a few things I missed, but nothing more than a good loaf of Maltese Bread! I tried the fancy bakeries and the not so fancy stores but nothing came close, so within a week of settling down, I got my first bread machine! It was and still is the most used gadget in my kitchen to date! I’m actually on my third one which is less than a month old and a gift from my lovely family in Malta…love you guys soo much!
So I’ve been making bread for years and years but I still had not come close to the taste and texture of the Maltese Ftira that everyone falls in love with on their first visit to the lovely Island of Malta. Every now and then, I’d do a search for nothing, but never gave up. Then along came fb and there it was…the recipe I’d been looking for all these years on Ilovefood.com. It was quite a detailed recipe from a Linda Speight from London!! The thing that captured my interest from the get go, was her first sentence, which went something like “This is much easier than it sounds…”. Plus she had written the recipe in so much detail that I thought there was no way I could fail! And so I set on another mission to see if this was the recipe of my dreams.
Being an avid baker, I had all the ingredients on hand and started making the starter, which I’d always found intimidating. And the rest is history. The best part though, is that Linda and I are best of friends. We bonded over bread and we now chat all the time, sharing recipes and talk about food and weather and everything in between!!
Ok…so if you googled Maltese Bread or Ftira and Google brought you to my blog, you must be eager to get started and make this delicious bread in your own kitchen. I have tried making this recipe with AND without a bread machine and I have to admit that this ONLY works with a bread machine.
Recipe…
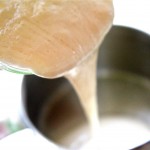
You have to have a starter….if you don’t, don’t worry, it’s really easy to make your own…
All you need is a clean jar and some flour and water.
Put a tablespoon each of water and flour in a clean jar and stir with a plastic spoon or chopstick which is what I use and cover. They say metal is not good…not sure why and I don’t ask questions. Store in a warm place away from direct sunlight.
Do this every day…each morning, add another tablespoon of water and a tablespoon of flour, and stir and cover…for seven days…and on the eighth day, you’re ready to start on your first loaf/rolls/ftira/pizza/focaccia…oh so many things you can make!!
In the bread machine pan, put
1/2 cup starter
slightly less than 1.5 cups water or, in this case, whey
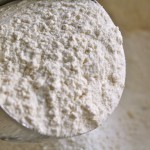
3 cups strong hi gluten flour (very very important you use strong flour with at least 11gr of protein)
2 tsp sugar
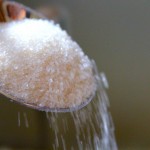
1½ tsp salt
1 tbsp olive oil
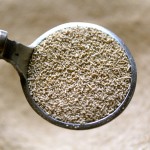
1.5 tsp yeast
Ingredients
120gr starter
300gr cups water
(together the starter and water should weigh 420gr)
420gr-450g high gluten flour (depending where you live) 2 tsp sugar 2 tsp salt
2 tblsp olive oil
1 1/2 tsp yeast
Put everything in the bread machine on the dough cycle. When it’s done, take out the dough and let it rest for about five minutes. Divide in 3 equal parts. Take each part and flatten it a bit to about 8-10 inch rounds. Tear a hole in the middle. Cover and let it rest until double in size for about half an hour but it really all depends on how warm your kitchen is. Bake at 425 for about 12-15 mins. Again, it depends on your oven, so keep an eye on it.
Now that you made this, don’t forget to feed your starter every day. Just add equal amounts of water and flour and this can go on for years! If you need to go on holiday or just need a break from making bread, just store the starter in the fridge. When you’re ready to use again, take it out, feed it and use it at room temperature.
Hope you enjoyed this post and if you make this bread, I’ll be very happy to hear how it turned out for you or answer any questions. Here’s to bread!!
Ha ha, how exciting is this!! I feel like I’m the master of my domain…
So here goes…
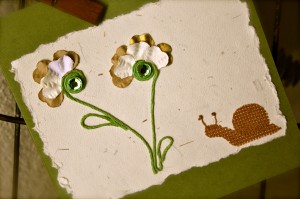
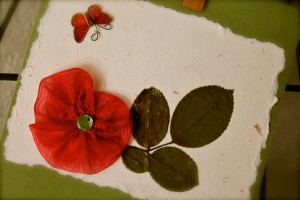
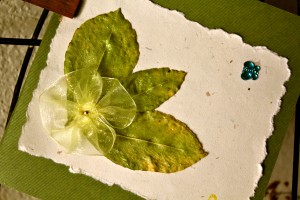
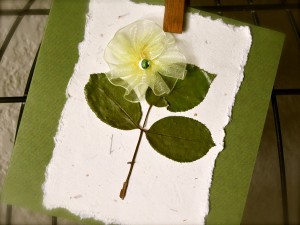
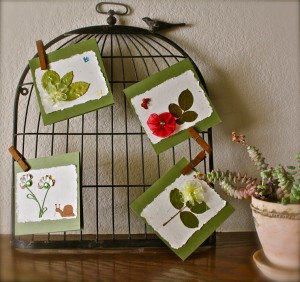
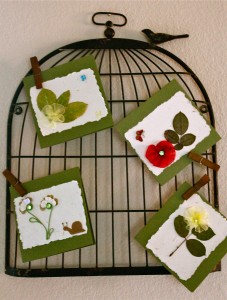
Lately I have been trying my hand at card making. I think I’m more frugal than crafty…and the way this started was because I saw a beautiful rose bloom that had been blown off the bush by the wind and I did not have the heart to throw it away, so I decided to dry the petals in a kit I had bought for my daughter and who never used it.
Months later, a Gizmodo Challenge had us take a photo of something on our Iphone. The Bay Area was going through a series of storms and there was NO WAY I was going to go outdoors for a photo shoot in temps less than 60!! So I had to think of something creative to take a photo of, and that’s when I remembered my drying petals. The result was quite neat…
Ancient Bloom
And that was what inspired me to do another one…and another and another….